How to Create MailChimp Landing Pages That Convert
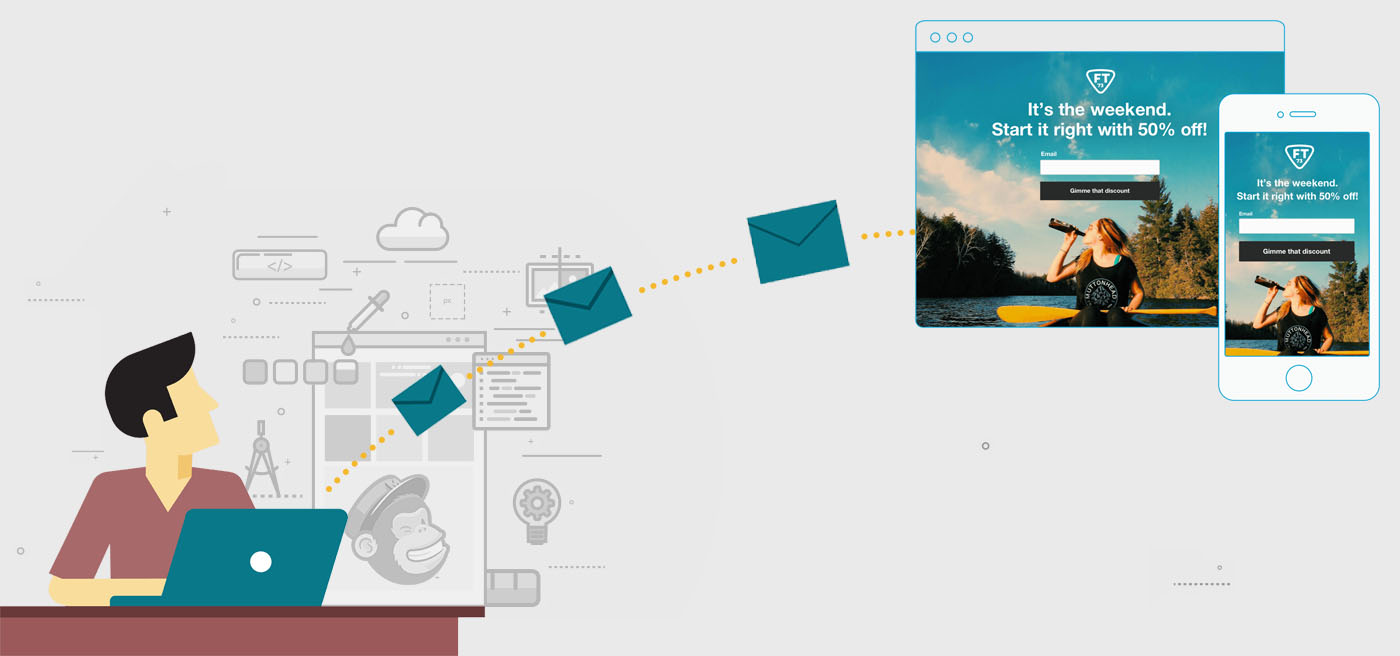
Everyone has heard about MailChimp. If you’ve got a business that’s more than a couple of months old, you’re probably already using it. It’s one of the best Email marketing tools around. We use MailChimp every day and it has been phenomenal for us in a lot of ways. It’s cheap, it’s easy to use and it has a large variety of features to make your campaigns highly effective. Today, we are going to talk about one of its really useful features: Landing page.
What is a MailChimp Landing Page?
It has only been a year since MailChimp’s new feature, Landing Page has been released.
Unlike the homepage of a website, this landing page is a standalone webpage that focuses on a short-term goal. Your leads will land on this page from an Email or an advertisement. You can use this landing page to sell a product, promote an offer, sign up for a newsletter or fulfill your other marketing purposes.
Talk to Our MailChimp Expert for Free
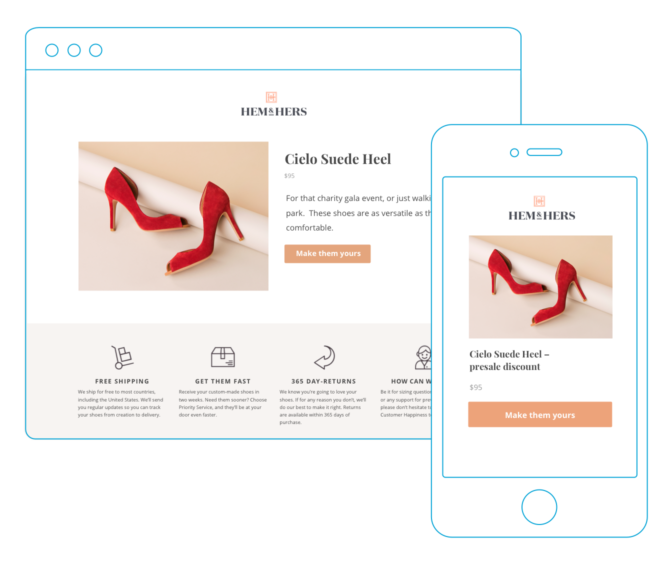
(Image Source: https://mailchimp.com/resources/boost-your-business-with-landing-pages/)
The landing page provides a direct call-to-action to accomplish a specific purpose.
In this blog, we are going to talk about how to create a landing page and share some tips on designing it in a way that converts.
Some Rules
- First one is a no-brainer. You need to have a MailChimp account properly set up. Add your company details, link your social media pages etc.
- Secondly, you need to have an Email list connected to your landing page. This is the list of people you want to send this landing page to.
- You can modify the landing page the way you want to at any stage. But you cannot change the landing page URL.
- You cannot include customized HTML tags, iframes or embed videos in your landing page
How to Create a MailChimp Landing Page?
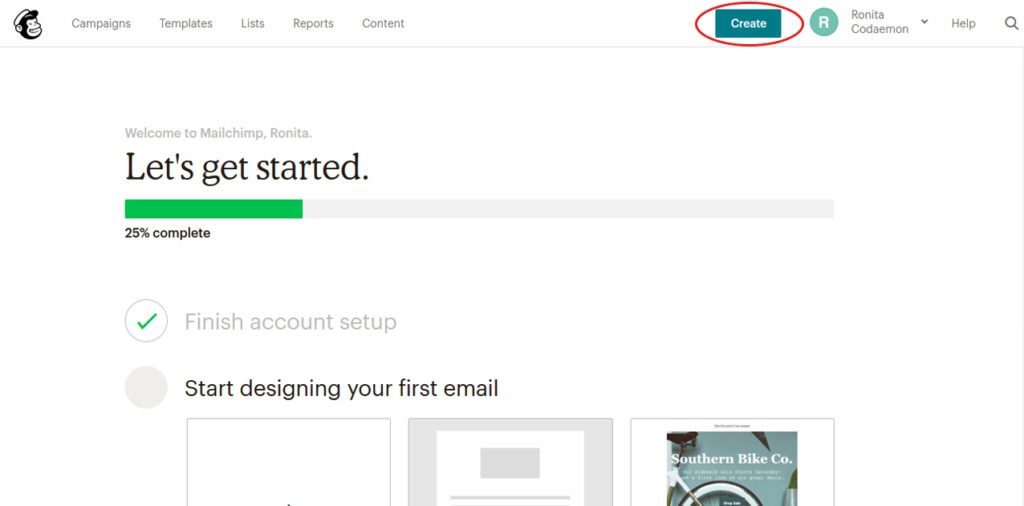
Step 1.
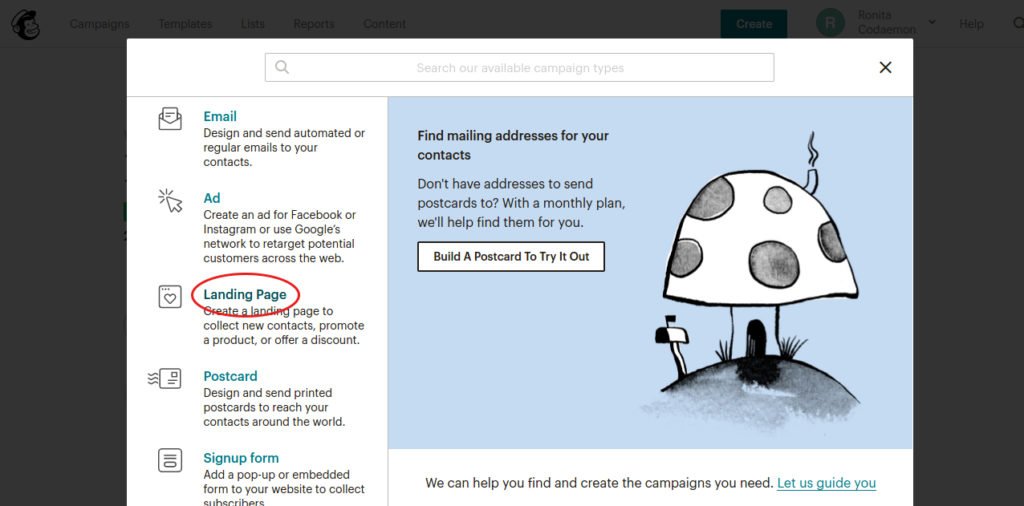
Log in to your MailChimp account. Click ‘Create’ and choose ‘Landing Page’ from the list.
Step 2.
Give a name to your page. Right beneath it, you will find a dropdown menu from where you can choose the list of people you want to target. Click ‘Begin’.
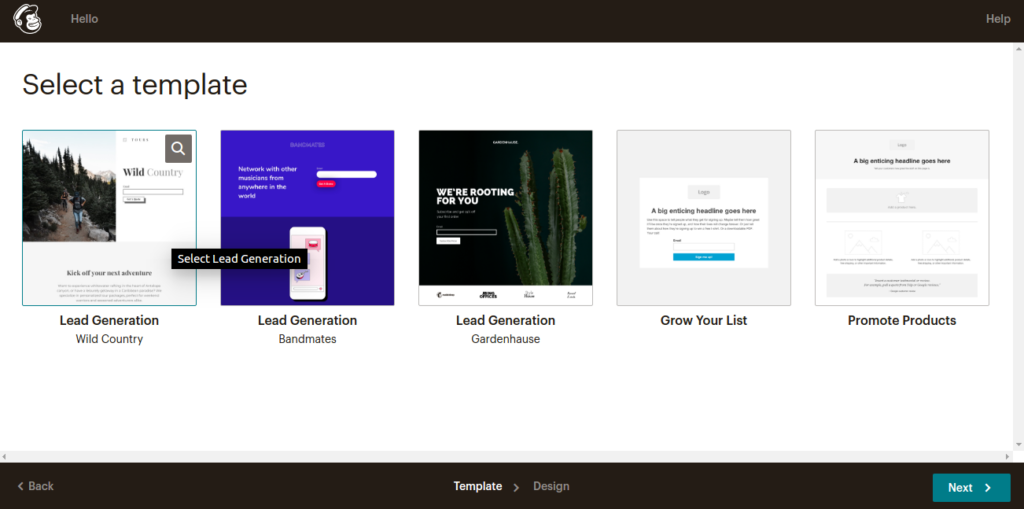
Step 3.
Now choose a landing page template from the options provided. You can customize the content, add/delete blocks and design the page the way you want to. Once complete, you can preview and save your work.
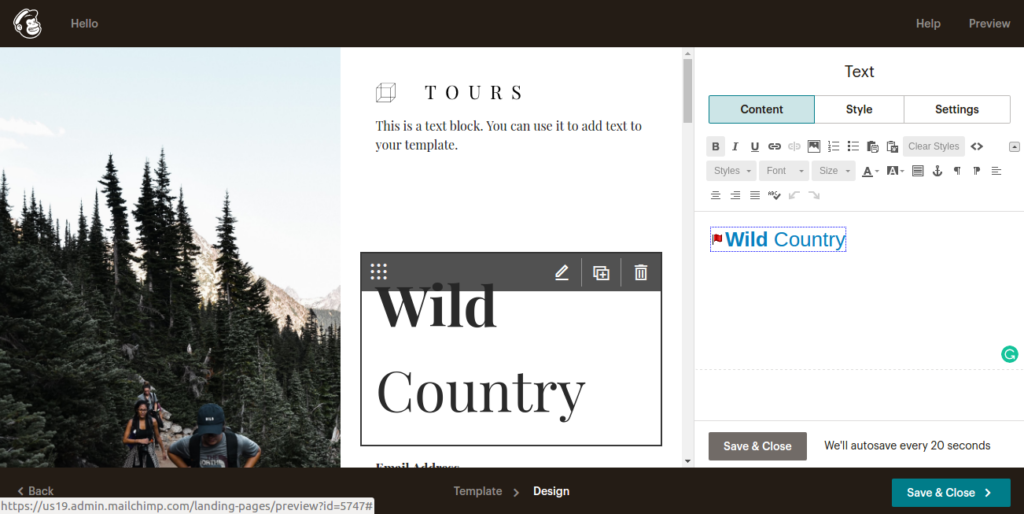
Step 4.
You will now be directed to add a Page Title. Your contact list will see this name in the title bar of the browser once they click through to the landing page.
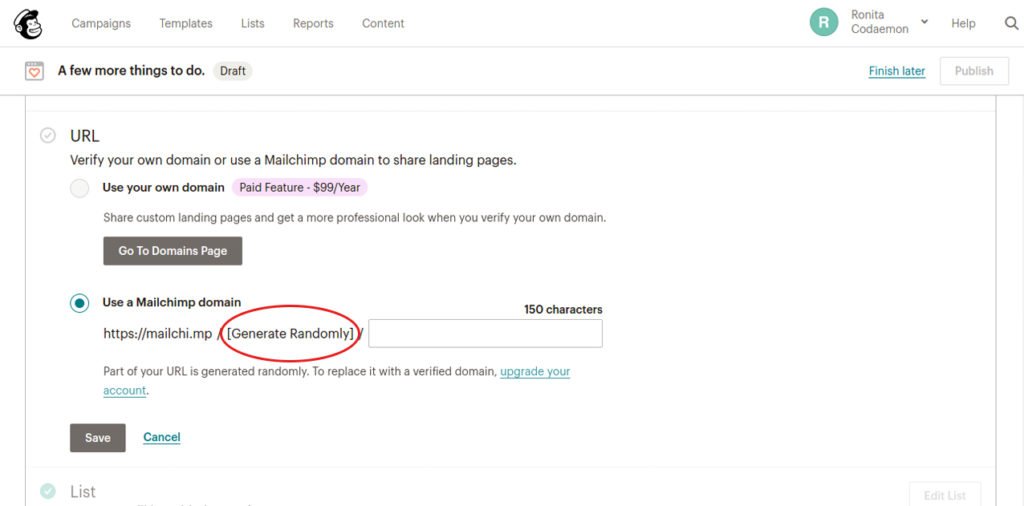
Step 5.
Now you need to add the landing page URL. But first, what is a landing URL? MailChimp landing pages are hosted in the MailChimp server. Each page has a unique URL.
MailChimp randomly generates a domain for you. You can choose the next part of the URL. If you have a paid account, you can choose your own domain. This will make the URL look more professional. Once you finish, save the changes made.
Step 6.
You can track conversions of your landing page in any one or all of the 3 ways available:
- Cookies
- Facebook Pixel
- Google Analytics
To enable this, you need to accept the additional terms and conditions and then click on the checkboxes against these options and provide the respective IDs.
If you do not have Facebook Pixel set up for your website, here’s a video on how to do it easily.
Also, this guide offers extensive details on Facebook Pixel for you to read up on.
Step 7.
Once you save the above additions, you are ready to publish your first landing page. That’s it.
How to Design the Landing Page in a Way That Converts?
This is the most crucial part of your landing page creation. Designing it. Let’s look at how you can make it compelling enough for viewers to convert.
1. Use Beautiful Images
The first thing a viewer will notice on your landing page is the image. A high-quality image almost always does the trick. When it doesn’t, there’s always copy to save the day. You can download royalty-free HD images from Pexels, Pixabay. Both of these have really relevant images that are quite likely to fit the bill. These tools have been exceptional for me even though I’ve had to improvise a little sometimes.
Another option would be to use the “Labelled for reuse” photos on Google Images. You’d be surprised how cool some of the images are.
Apart from images, you can also use videos to make things more interesting.
2. Lay Stress on Copy
Even though it’s just one page and one page only to get the information across, I highly recommend against stuffing it with copy. The landing page copy should be crisp and to-the-point. That said, don’t compromise on the information you are giving out. If it’s a product, ensure that you have laid out the important specs that you want to highlight in a concise way that doesn’t turn out to be boring.
Structuring your copy properly is important. An eye-catching headline will get your users scrolling to the body of the page. In here, you will instill an urgency in your readers. It could be a limited offer, a good deal on the other side of an Email subscription etc. Ensure that your company logo is at the top and is properly visible so that your users notice and remember it. Add clear subheads to keep it interesting. Otherwise, it would just look like a block of text that viewers will avoid reading.
Keep in mind that most of your audience is going to view this page from a mobile device. Therefore, try to avoid small fonts and keep the text short.
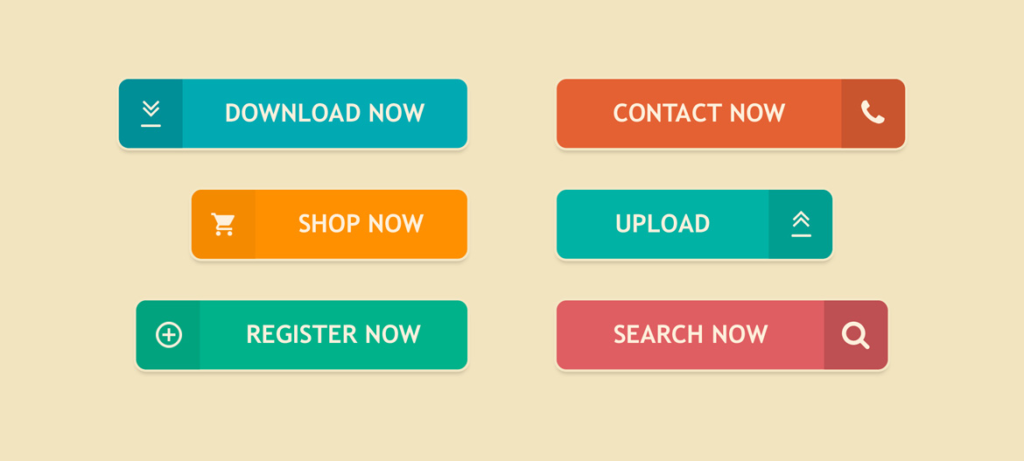
3. Add a Call-to-Action
The call-to-action depends entirely on the purpose of your campaign. It can be a subscription to a blog, product purchase, signing up to a service, increasing followers on social media, sending out invites to an event etc. Keep it towards the end of your page and make it bold. By the viewers scroll down to this section, they should have a clear idea of what the campaign is about and what is expected of them.
(Image Source: https://medium.com/swlh/6-best-practices-to-design-and-place-your-call-to-action-6089dafdbafd)
4. Clickable Social Buttons
Having a social presence adds credibility to your website. So, adding clickable social buttons enables viewers to get more up, close and personal with your brand. This gives them the ability to learn more about your organization on an informal level. Plus, it’s free marketing.
Others might argue that adding social buttons is a distraction from the main goal of the landing page. But I think it opens up another route for viewers to engage with your brand.
(Image Source: https://www.wordstream.com/blog/ws/2015/04/23/social-media-buttons)
5. Include Reviews
I know it sounds a little cramped up with all of the above points and then a review as well. But, if you structure it properly, a review in your landing will be a boon. Why? 85% of consumers trust online reviews.
What’s Next?
By now you have learned two things:
- How to create a MailChimp landing page
- How to create a MailChimp landing page that converts
So what happens next? Let’s take a look.
1. Publish it
Duh! Hit the publish button and your page goes live.
2. Share it
Copy the URL of your landing page and share it on your company’s social media pages and your personal profiles as well. This will drive a bunch of organic traffic to your landing page. You can ask your friends to share it so that it reaches more people.
3. Create Ads
Truth is, getting noticed is directly proportional to the reach you have on social media. There’s hardly anything that can get you more reach than an ad on social media. An ad will expose your landing page to not just the people who follow your company page, but also your target audience who would have an interest in your ad and your brand. You can use MailChimp to create Facebook and Instagram ads. Check out this guide to find out how.
4. Set up a “Thank You” Email
Once a viewer completes the goal of the landing page, the least you can do is say “Thank you”. This would make the viewer feel appreciated for his/her effort. In the “Thank you” Email, you can tell them a little about your business, how the goal that they have completed will benefit them, what they can expect of you etc. It’s a nice way of welcoming another audience to your brand. Use MailChimp to create this automated Email. That will save you a lot of time.
Here’s a quick video on how to do that/
Conclusion
MailChimp landing pages are excellent ways to start a campaign. The best part is, it doesn’t take much time to create and promote one and most of it is automated. Be sure to test it out before sending it to anyone. If you need any help with the MailChimp landing page, we are just an Email away.